- Connect to Mac
- Connect to Windows
- Connect to NAS Drives
- Connect to Cloud Storage
- USB Drives
- Map an App folder
- File Selection Mode
- Selecting Images in the Image Viewer
- Copying Files
- Drag and Drop
- AirDrop Files
- Copy Large files with macOS Finder
- Share Files
- Copy to iOS Clipboard
- eMail Files
- Download Files Using URL
- Bulk Rename - Add text to filenames
- Bulk Rename - Find and Replace
- Bulk Rename - Rename with Dates
- Bulk Rename - Rename using EXIF Data
- Rotate Images
- Convert Images
- Create Contact Sheets
- Rate Photos with XMP
- Remove GPS from Photos
- Edit IPTC Properties on Photos
- Slideshows
- - Chromecast Images
- - Airplay Photos
- Supported Music Types
- Play Modes
- Queueing Tracks
- Speed Up/Slow Down Playback
- AirPlay Music
- Chromecast Music
- Cast Music to Alexa Devices
- Recording Audio into FileBrowser
- Create Custom Tasks
- Monitor a Folder for a Keyword and Download Hourly
- Download PDFs from the Last 7 Days
- Trim PDF Pages
- Change IPTC Properties on Images in Bulk
- Rotate Images in Bulk
- Automated Backup of Video Files from a Chosen Folder
- Automate Backup and Deletion of Files Older than a Chosen Date
- Remove GPS from Multiple Photos
- Convert Images in Bulk

Working with Images
Rotate, flip, scale, crop or convert image formats on your iPhone/iPad with FileBrowser Professional.
Rotate Images
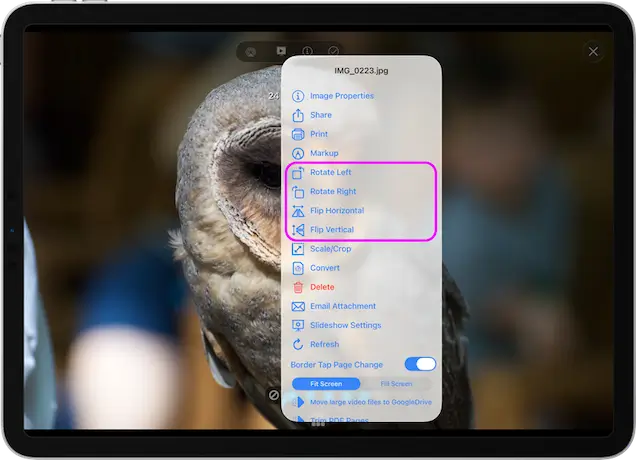
To rotate an image, open an image then tap the file menu and choose one of rotation options available.
Flip Images
To flip an image, open an image then tap the file menu and choose one of flip options available either vertical or horizontal.
Scale & Crop
Scale to Size
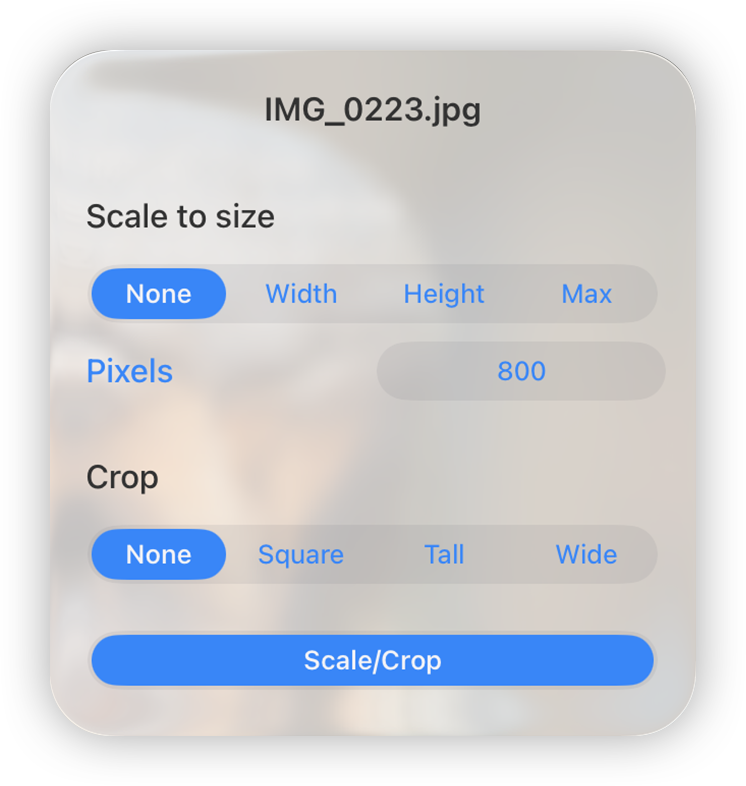
You can scale the image to a set size by setting the axis and designating the size in pixels.
Crop
You can crop the image to one of the presets, tapping each option will give you a preview.
Note: Images in the Photo Library need to be copied elsewhere before they can be edited.
RAW photo formats cannot use the Rotate, Flip, Convert, Scale and Crop options.
Convert Images
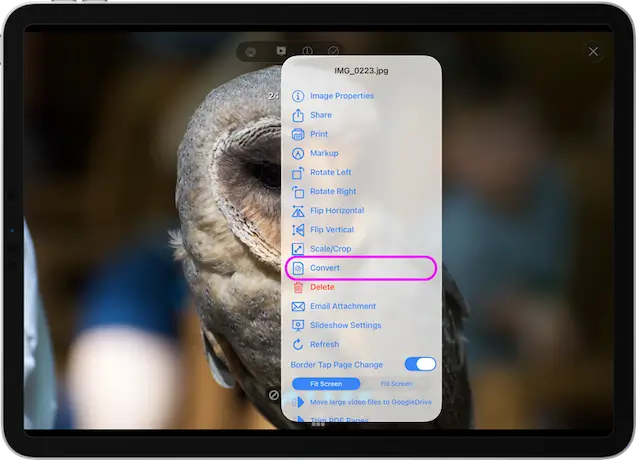
To convert an image, open the file’s menu and choose Convert. This option is also available on the image viewer menu if you open the image first. Images in the Photo Library need to be copied elsewhere before conversion.
Convert your image to one of the following formats:
- JPG
- HEIC
- TIFF
Note: This will create a copy of the file in the same folder.
Custom Tasks - Convert Images in Bulk
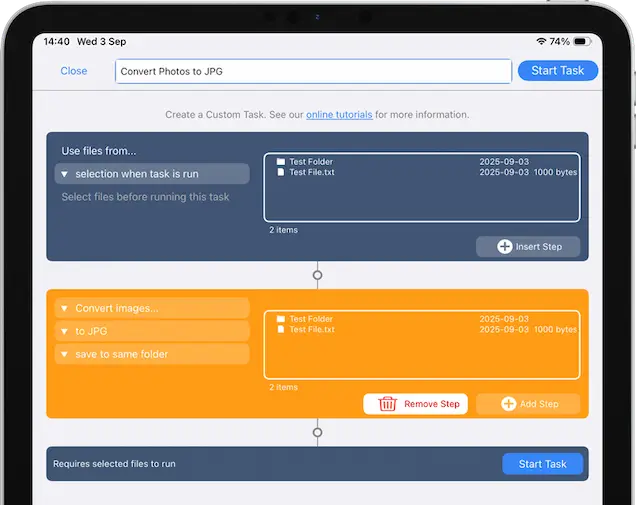
To convert multiple images you need to create a Custom Task. Follow our simple steps below to create a task that you can re-use easily on any photo selections.
- From the Home Screen, tap the "All Tasks" locations and tap the "+" icon in the bottom toolbar and select "Create Custom Task".
- Give your new Custom task a name like "Convert to JPG"
- Tap the "Insert Step" button
- Change this to new section to "Convert Images..." and tap the second dropdown and select the format you want your images converted to.
- Set whether you want them saved to the same folder or not.
- Once done tap "Close".
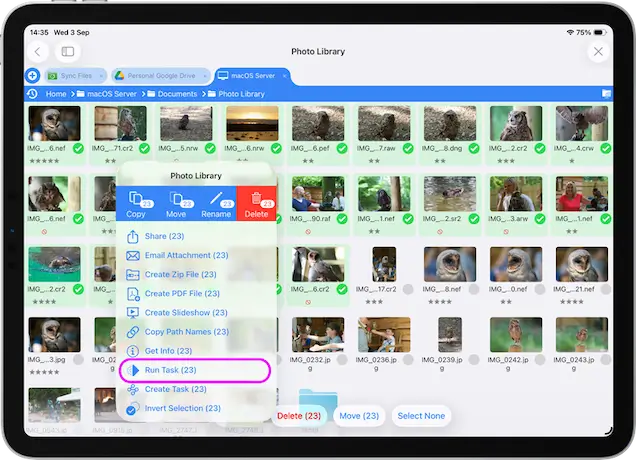
Return to your folder with your photos in:
- Tap "Select" then select all the photos you want to convert.
- Tap the 3 dots Context menu and select "Run Task".
- A menu will appear showing you all your Custom tasks, select the new "Convert to JPG" task you just created.
- This will show you a summary of changes, tap "Start Now".
Your custom task has been saved so you can re-use this on any photos you select in future.
Create Image Contact Sheets
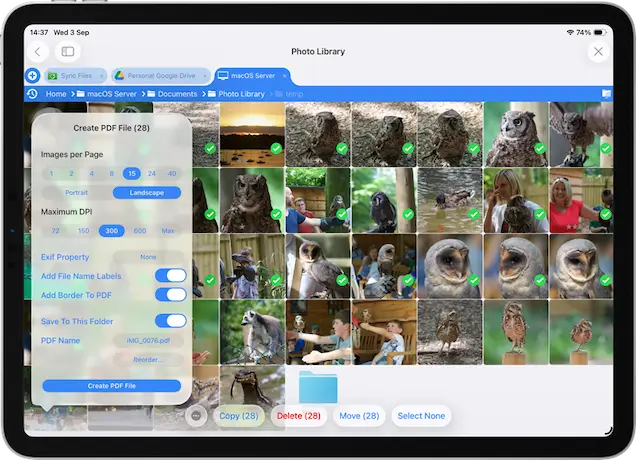
Easily create image/photo contact sheets on iOS with FileBrowser Professional with the following steps:
- Select multiple images in a folder and then tap the menu icon (bottom left). Select "Create PDF File".
- Select the number of image you want per page.
- Select your paper orientation, portrait or landscape.
- Choose the quality by selecting DPI
- Optionally choose an Exif property to add to your file labels
- You can also add the filenames underneath each image for easy reference.
- Reorder - From here you can drag the photos into your prefered order.
- Tap "Create PDF File" and the new PDF will be saved into the current folder. If you want to save the PDF to another location uncheck "Save to this Folder" and the file will be copied to your clipboard.
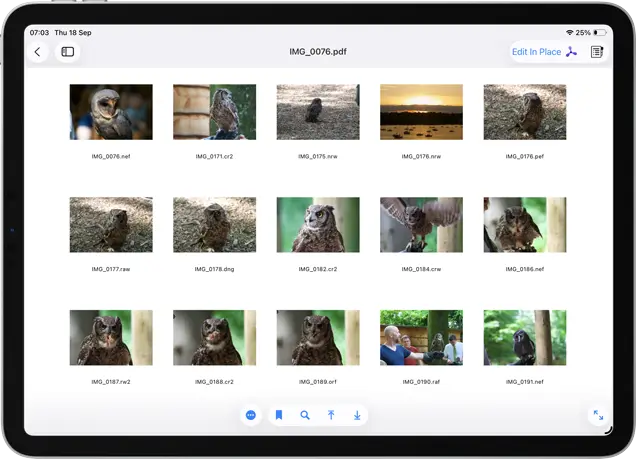
The finished PDF file should look something like this.
You can change the number of images per page, set the orientation of your PDF, change the DPI, reorder the images, add file names to the images and add meta data from the create PDF dialog.
Rate Photos with XMP
There are several ways to rate your photos using XMP:
Image Properties
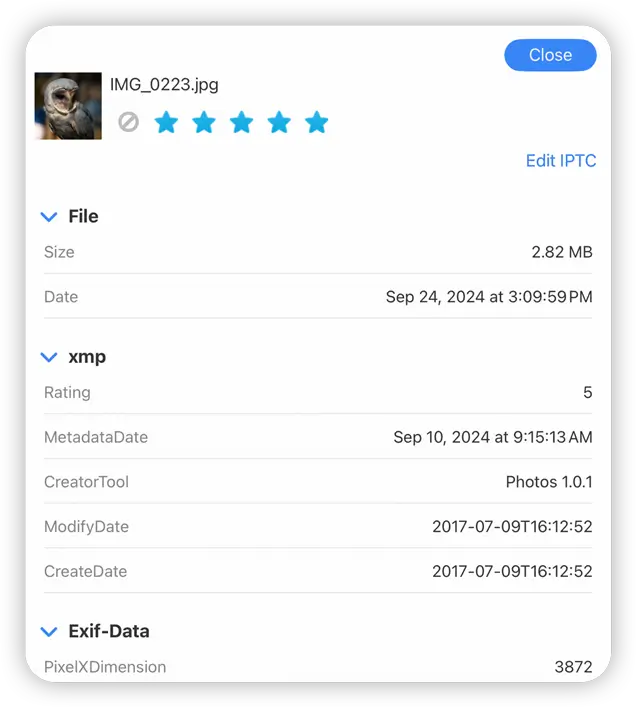
Tap a photo to view it full screen, then tap the "i" icon in the top menu, you can Rate or reject the photo using the star icons.
From Full Screen
Tap a photo to view it full screen, then tap the screen again. Rate or reject the photo using the star icons at the bottom of the screen.
To remove a rating tap the current rating icon again.
From Gallery View
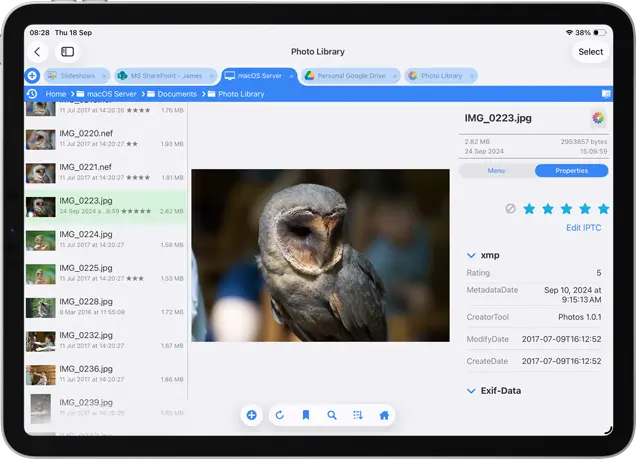
- Tap the sort icon and change your view mode to one of the "Gallery" modes.
- Then tap the "Properties" header on the right.
- Select a photo in the file listing and edit the Star rating on the right.
Tip: Keyboard shortcuts for when viewing in fullscreen or in Gallery view. Type “0” to “5” (or “x” to reject) on an external keyboard.
Use Right and Left arrow keys to move to next and previous images.
Remove GPS from Photos
You can remove GPS from your photos either individually or in bulk:
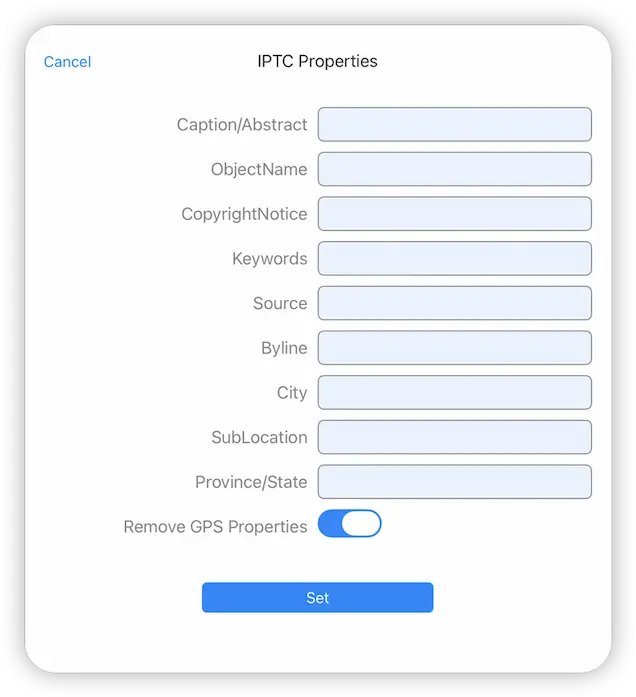
- Open the photo you want to remove the GPS information from.
- Tap the "i" icon in the top toolbar.
- Then tap "Edit".
- Now enable the "Remove GPS Properties" switch and tap "Set".
Custom Task - Remove GPS from Multiple Photos
To remove GPS properties from multiple photos you need to create a Custom Task. Follow our simple steps below to create a task that you can re-use easily on any photo selections.
- From the Home Screen, tap the "Sync Files" locations and tap the "+" icon in the bottom toolbar and select "Create Custom Task".
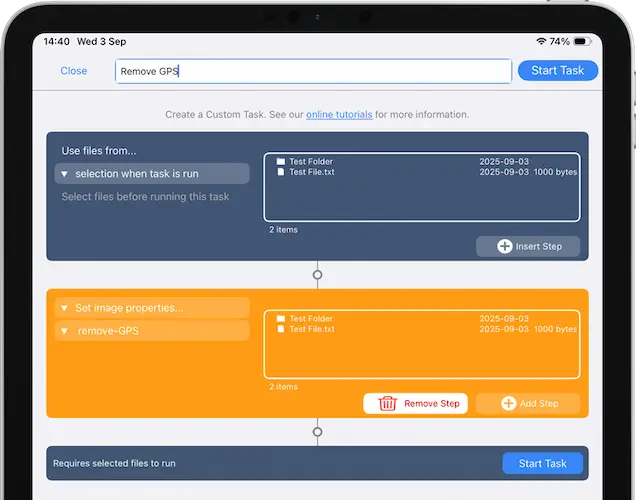
- Give your new Custom task a name like "Remove GPS"
- Tap the "Insert Step" button
- Change this to new section to "Set image properties" and tap the second dropdown turn on "Remove GPS Properties" and tap "Set".
- Once done tap "Close".
Return to your folder with your photos in:
- Tap "Select" then select all the photos you want to remove their GPS Properties from.
- Tap the 3 dots Context menu and select "Run Task".
- A menu will appear showing you all your Custom tasks, select the new "Remove GPS" task you just created.
- This will show you a summary of changes, tap "Start Now".
Your custom task has been saved so you can re-use this on any photos you select in future.

Edit IPTC Properties on your Photos
You can edit your IPTC properties on your photos such as Copyright Notices, Keywords or location data. Edit them either individually or in bulk:
Single File
- Open the image you want to edit the IPTC information from.
- Tap the "i" icon in the top toolbar.
- Then tap "Edit".
- Now enter the IPTC information and tap "Set".
To remove GPS information turn on the toggle switch and tap "Set".

Edit IPTC Properties on Multiple Files
To edit IPTC properties in bulk on multiple files you need to create a Custom Task. Follow our simple steps below to create a task that you can re-use easily on any photo selections.
- From the Home Screen, tap the "Sync Files" locations and tap the "+" icon in the bottom toolbar and select "Create Custom Task".
- Give your new Custom task a name like "Edit IPTC"
- Tap the "Insert Step" button
- Change this to new section to "Set image properties" and tap the second dropdown and edit the IPTC Properties then tap "Set".
- Once done tap "Close".
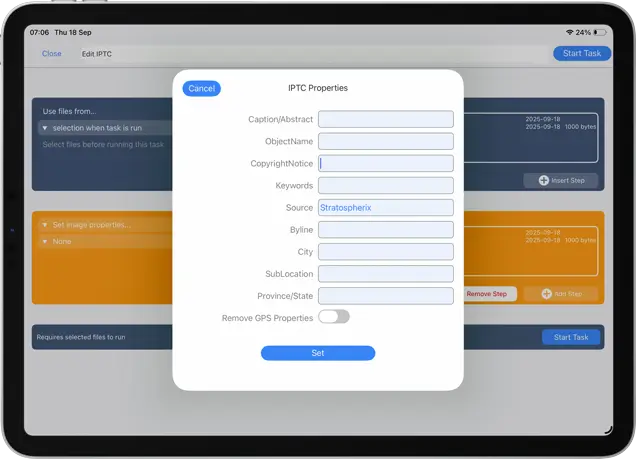
Return to your folder with your images in:
- Tap "select" then select all the images you want to change their IPTC Properties.
- Tap the 3 dots Context menu and select "Run Task".
- A menu will appear showing you all your Custom tasks, select the new "Edit IPTC" task you just created.
- This will show you a summary of changes, tap "Start Now".
Your custom task has been saved so you can re-use this on any photos you select in future.

Slideshows
Slideshow Current Folder
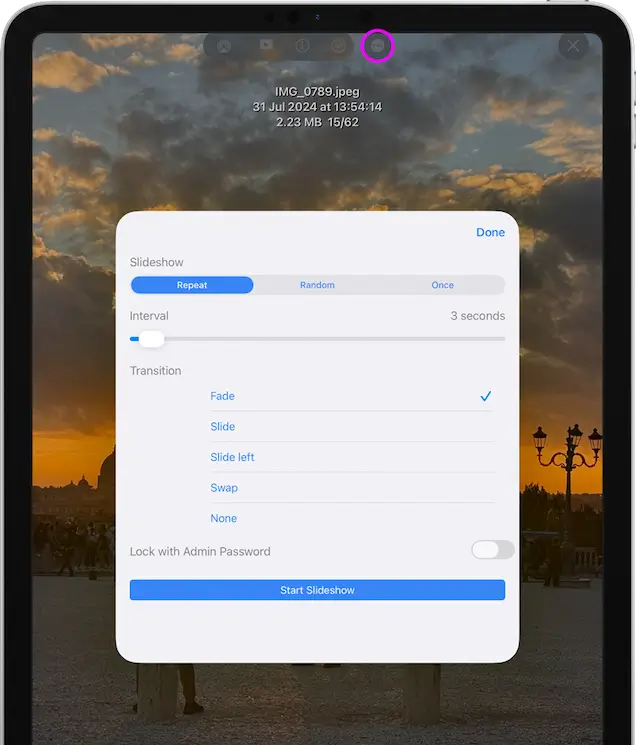
Open an image then tap the slideshow icon. If you want to change the slideshow settings tap the image actions menu and select "Slideshow Settings".
Save Slideshows
You can create and save Slideshows in two ways:
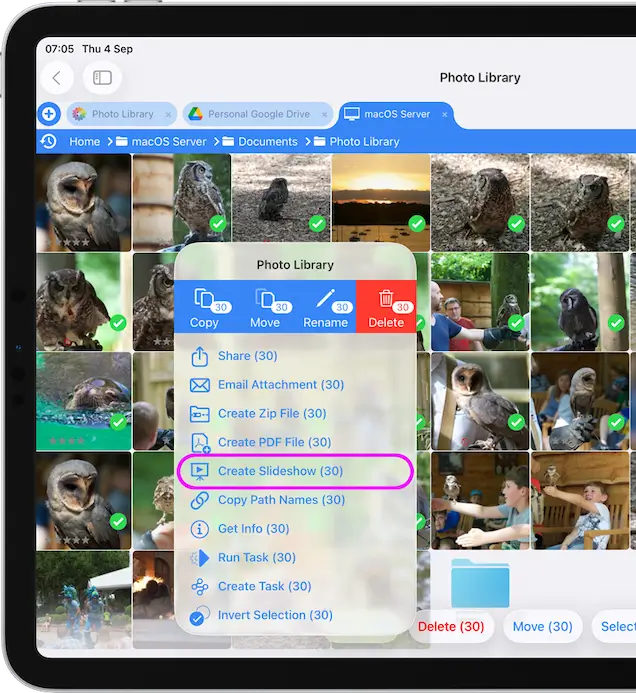
- Select multiple images and use the toolbar action menu to select "Create Slideshow".
- Tap a folder actions menu and select "Create Slideshow".
Note: This will include all the photos in any subfolders also.
If you can't see "Create Slideshow" you may need to Enable "Slideshows". Tap the Cog icon on the home screen and select "Admin Settings -> Feature Switches" and toggle on "Show Slideshow Location".
Manage Slideshows
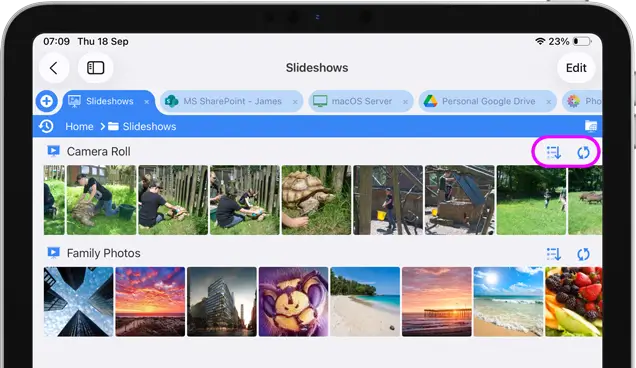
- On the home screen tap the "Slideshows" location.
- From here you can reorder your slideshow or refresh the slideshow contents
- To Delete or Rename Slideshows tap the "Edit" button in the top right.
Lock Slideshows with a Password
If you lock a slideshow you cannot exit the slideshow without entering your admin password. Simply toggle the switch in "Slideshow Settings". Great for Showing customers images without giving them access to all the files on your servers or iPad.
Note: You need to have enabled an Admin Password to use this setting.

AirPlay™
Airplay your Photos to your HDTV
If you have Apple TV or AirPlay™ enabled media server such as KODI, use FileBrowser Professional to relay your Images to your big screen. View your image full screen and tap the AirPlay icon on the toolbar and select your device.
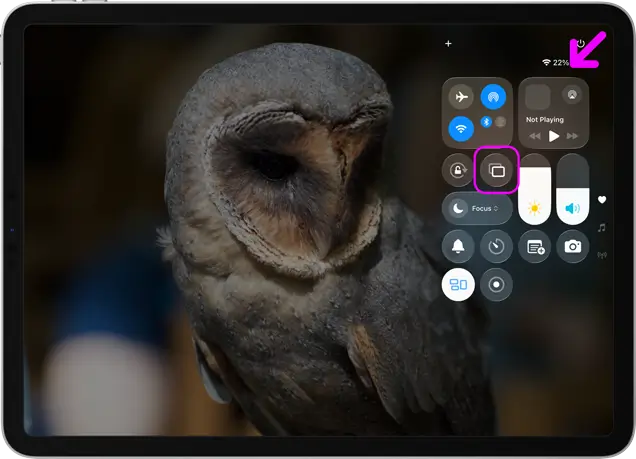
AirPlay Images
- Swipe down diagonally from the top right corner of your iPad or iPhone.
- Then select the Screen Mirroring button.
- Select your TV from the list of available AirPlay devices.
You can now view your photos one at a time or use the slideshows feature.

Chromecast
Chromecast your Photos to your HDTV
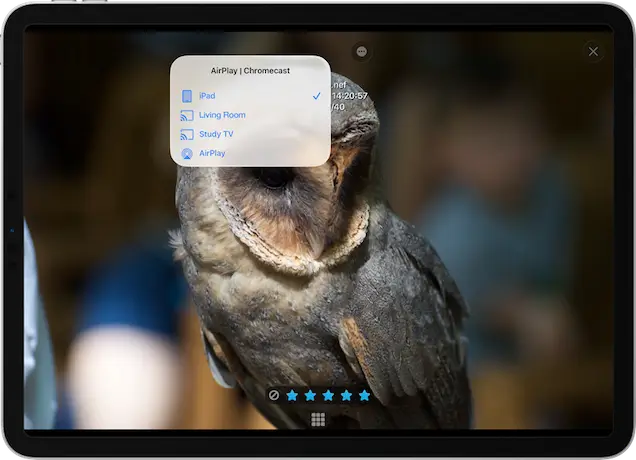
To stream your images to a Chromecast device, view your image full screen and tap the Airplay icon on the toolbar and select your Chromecast device.
- Select the photo you wish to view.
- Tap the cast icon in the top menu.
- Select your Chromecast device from the menu.
- Once an image is displayed on the device, swiping through images or starting slideshows will all appear on that device until you switch it back to iPad.
If you don't see the cast icon, either your Chromecast isn't turned on or Chromecast might be disabled under "Preferences -> Feature Switches -> Allow Chromecast/AirPlay".

Accessing your iPad or iPhone's Photos
You now have access to the photos synced to your iPad or iPhone from iPhoto. Tapping the "Photo Library" heading in the left hand column will allow you to browse the built-in iOS Photo Library.
Note: Photos in the Photo Library need to be copied elsewhere before they can be edited or renamed.
Import from iOS Photo Library
Open your Photo Library select photos to import directly into the current FileBrowser Professional folder.
