Start a WebDAV Server on your iOS Device
When you start the FileBrowser WebDAV server on your iPad/iPhone, other iOS devices and Macs/PCs can connect to and browse local folders (or any other remote locations you enable via the settings in FileBrowserGO or FileBrowser Professional).
Start WebDAV Server
To start the WebDAV server on your device:
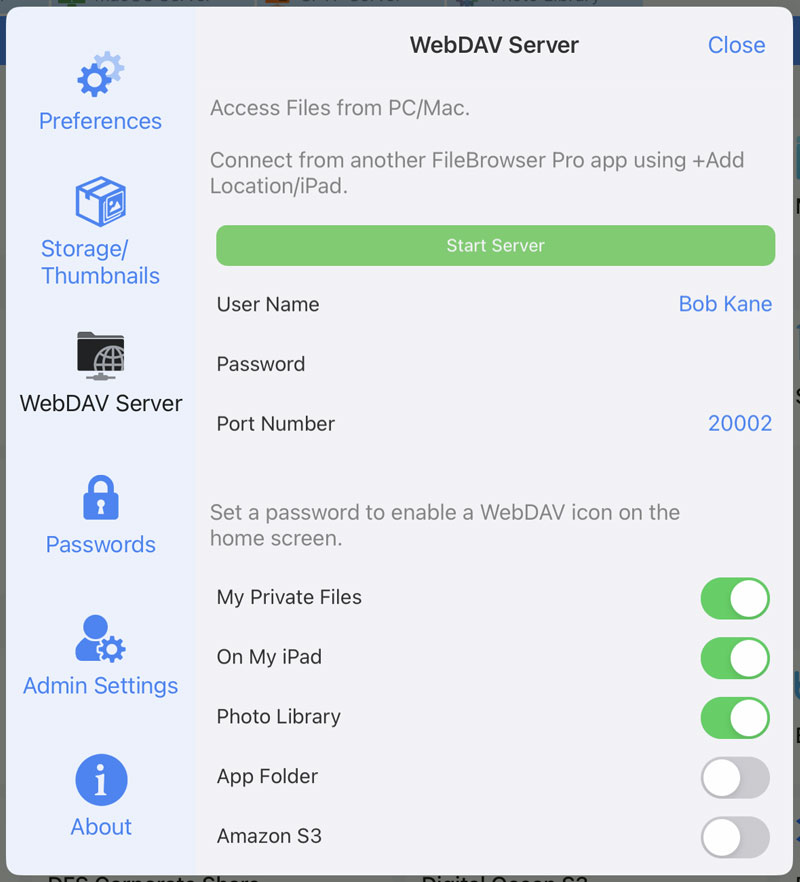
- From FileBrowser's home screen tap the cog icon
- Select "WebDAV Server"
- Set a user name and password for the server here
- Turn on the FileBrowser locations you want to share via WebDAV using the toggle buttons
- Tap the "Start Server" button.
Connect to your WebDAV Server
Connect to your WebDAV server from another device. The formats you have to enter these vary from device to device. See the examples below:

From iPad/iPhone
- Open FileBrowser and tap "Add Location"
- Select "iPad/iPhone" in the connection wizard
- Tap "Scan Now" and select your device from the list
- Enter the username and password you set earlier and tap "Save"
- This will auto-connect the first time and ask for your password again. Enter it and tap "Connect" and that's it
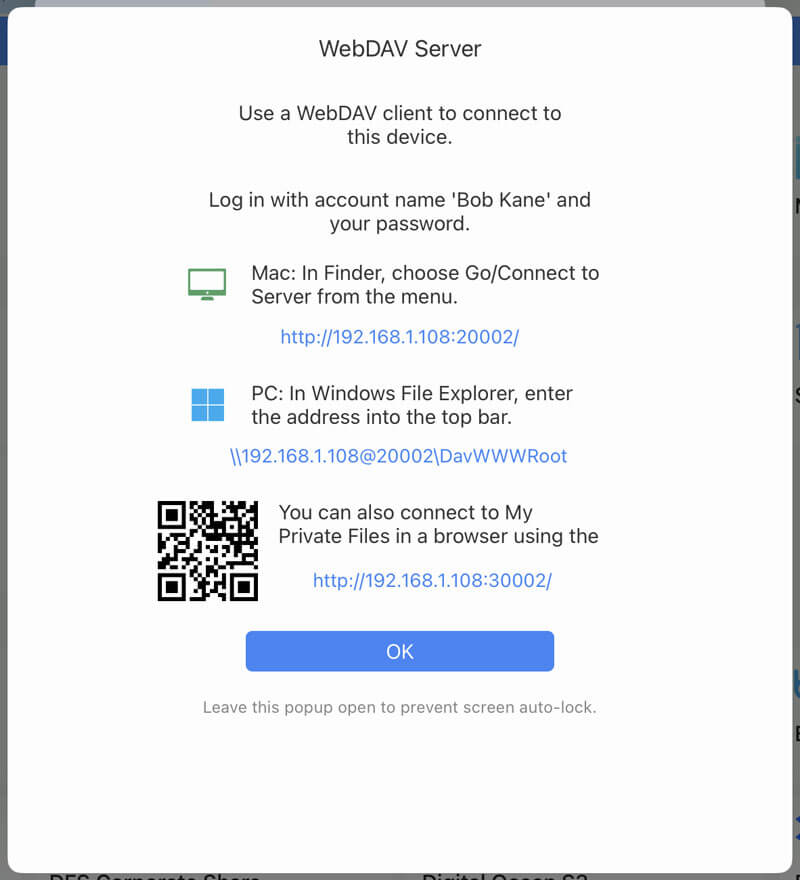
From a PC:
- Open Windows File Explorer
- Enter the url that was displayed in FileBrowser into the top bar. It will be something like "\\192.168.1.12@20002\DavWWWRoot".
- Enter your username and password you set on your device earlier and tap "Connect"
From a Mac:
- Switch to finder and tap "Go" in the top toolbar
- Select "Connect to Server"
- Enter the Mac url that was displayed in FileBrowser here. It will be something like "http://192.168.1.12:20002/" and tap "Connect"
- Enter the username and password you set on your device earlier and tap "Connect"
Download a Free Trial
This feature is only available in FileBrowserGO or FileBrowser Professional. Try this feature for Free with a FileBrowserGO trial or as a one off purchase with FileBrowser Professional.
FileBrowserGO

FileBrowser Professional