How to Connect to WebDAV Servers using your iPhone/iPad
Easily Transfer Files Between your Desktop and iOS Devices using WebDAV
WebDAV is not currently supported by the iOS Files app, however you can access WebDAV with FileBrowser' on iPhone and iPad, download the free trial of FileBrowserGO here and connect to your WebDAV servers today.
Step 1
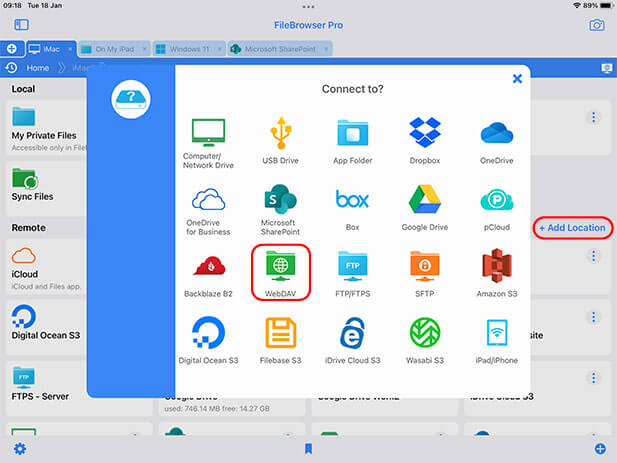
In FileBrowser from the homescreen tap the "Add Location" button then select "WebDAV" from the connection dialog.
Access your WebDAV servers on your iPad and iPhone with a free trial of FileBrowserGO
Step 2
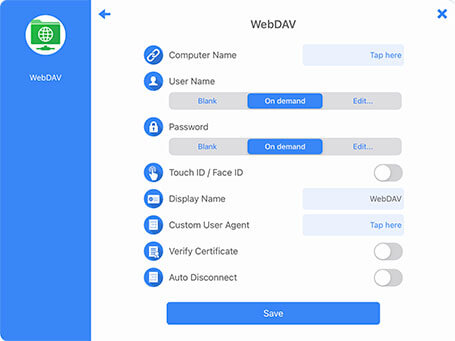
Enter either a WebDAV URL, a machine name or IP address into the "Computer Name" field.
For example:
- http://192.168.146.200/webdav/jim
- mymac
- 192.168.146.200
Enter your WebDAV User Name either by tapping "Edit" and entering it here or set it to "On Demand" and enter it each time you want to connect.
Enter your WebDAV Password either by tapping "Edit" and entering it here or set it to "On Demand" and enter it each time you want to connect.
Create a Display Name for your connection that appears on the FileBrowser homescreen.
Scroll down and tap "Save"
Now tap on the new ftp location you just created on FileBrowser's homescreen to connect to your WebDAV server.
If you need more advanced options see section below.
WebDAV Advanced Options
Custom User Agent: Some WebDAV servers require a specific user agent string to be passed with every request.
Verify Certificate: If https:// is specified in the connection address, the app will ensure that the connection uses TLS. Setting this switch enforces the TLS certificate check and the connection will not proceed unless it passes.
Auto Disconnect: Enabling "Auto Disconnect" will ensure that this remote server is automatically disconnected when FileBrowser is closed.