How to enable File Sharing in Windows 7
Follow our simple step by step guide on how to enable File Sharing in Windows and browse its files with your iPad or iPhone.
Enable File Sharing
Windows File Sharing may not be enabled, especially if you don't have other computers on your network or this is the first time you have tried to access shared folders over your network.
Use the following steps to enable it.
- Launch Control Panel.
- In the top right corner change your View mode to "Category".
- Then under the "Network and Internet" group click the "View network status and tasks" link.
- On the left hand side, click the link "Change advanced sharing settings".
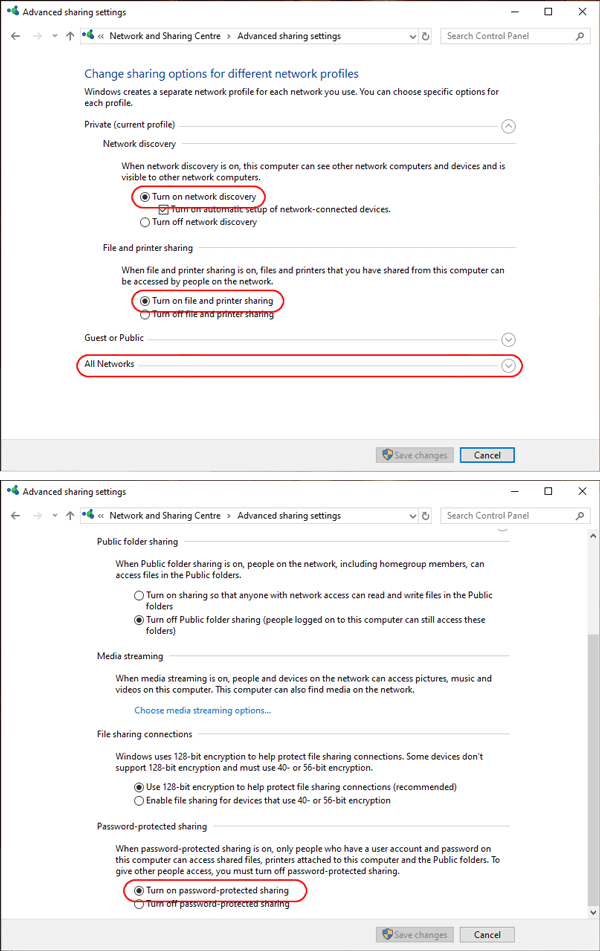
- Expand the Private section.
- Select "Turn on network discovery".
- Select "Turn on file and printer sharing".
-
Expand the "All Networks" section and scroll to the bottom, and enable "Turn on password-protected sharing" Turn on password protected sharing".
We recommend using password protected sharing, but if you want people with no username or password to be able to access your files (only those files marked for 'Everyone' access), then set password protected sharing to "off".
- Click "Save changes".
How to share a folder.
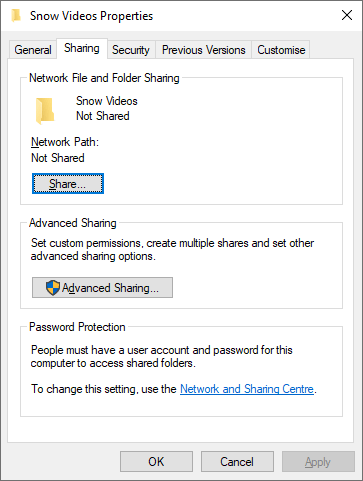
- Select a folder in Windows Explorer, right-click and choose "Properties"
- In the Properties window select the "Sharing" tab.
You should now see the window on the left.
Click the "Advanced Sharing..." button.
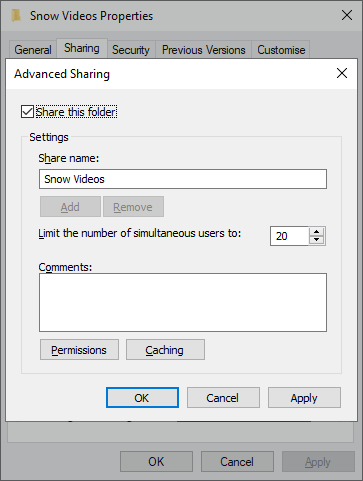
The window below should now appear. Tick "Share this folder" and then enter a Share Name that this folder will be known by on the network.
By default, the folder will be shared for read-only access for the user who creates the share. If you wish to change this security, click the "Permissions" button and choose the level of access that you require.
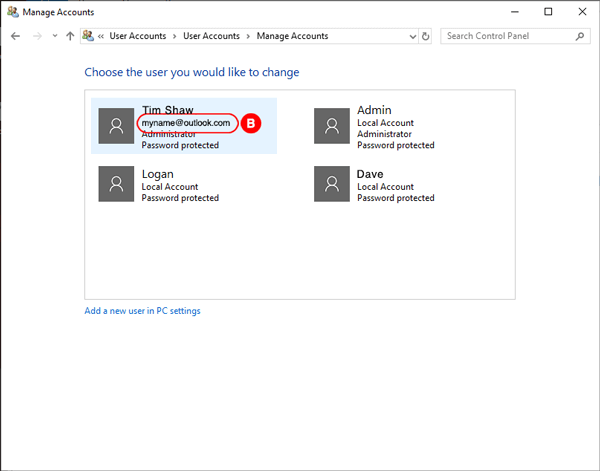
Find your Username
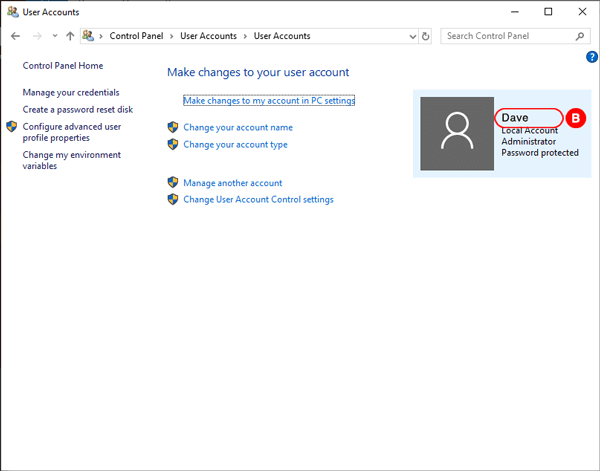
- Launch "Control Panel"
- Click "User Accounts" Now click "User Accounts"
- The user account you are currently accessing is highlighted on the right. If this is not the one you want to log in as, click "Manage another account" and select another. We recommend choosing one that has "Administrator" written under it. Enter your username into FileBrowser's "Username" field.
- If the account you have chosen does not say "Password protected" under it, then it has no password. You need to click the "Create a password" option. Having a password will mean that you will need to enter it each time you boot your Windows PC.
- Take note of this username and password as these will be the ones you enter into FileBrowser later.
Scan your Network
In FileBrowser follow these steps:
- From the home screen.
- Tap "Add Location" to the right of the "Remote" Section.
- Tap "Computer / Network Drive" this will start a scan of your local network.
- Select your computer from the list.
- Enter your credentials and tap 'Save'.
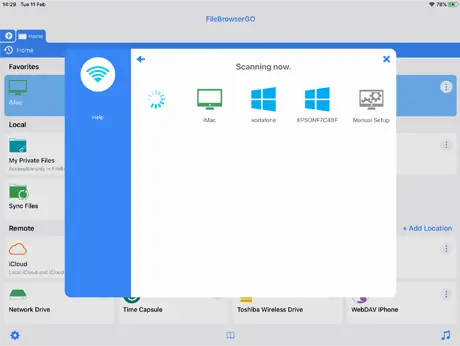
If the scan hasn't worked try adding it manually
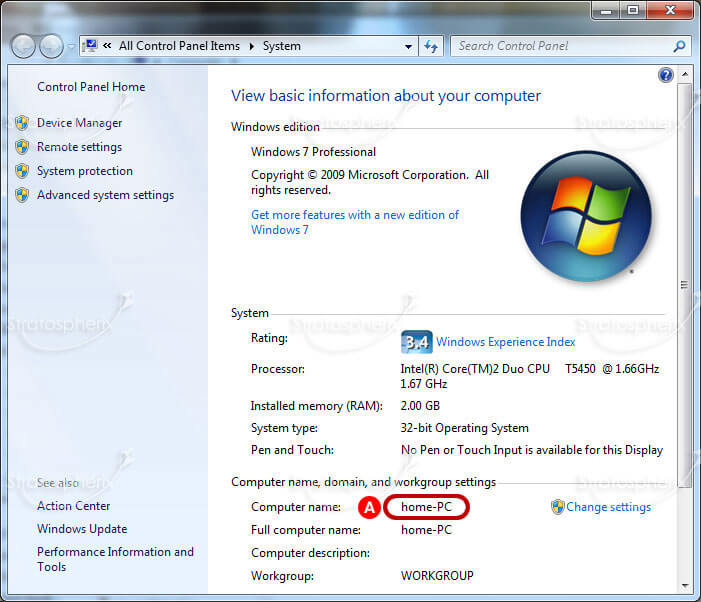
Find Computer Name
- Launch File Explorer.
- In the left-hand pane, find the "Computer" or "This PC" node.
- Right-click it and choose "Properties".
- You should now have a window that looks like the following.
- The text ringed is your computer name.
- This will be the text to enter in FileBrowser's "Name or URL" setting.
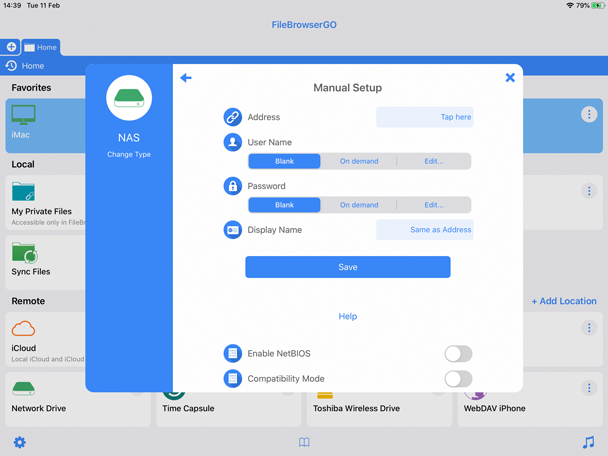
In FileBrowser follow these steps:
- From the home screen.
- Tap "Add Location" to the right of the "Remote" Section.
- Tap "Computer / Network Drive" this will start a scan of your local network.
- Tap the 'Manual Setup' icon.
- Take the machine name labelled above with an 'A' and enter it into the 'Name or URL' field.
- Take the username labelled 'B' above and enter it into the 'Username' field.
- Enter the password for your user account into the 'Password' field. If your account doesn't have a password, tap the 'Blank' button.
- Tap the Save button.
- Tap your new location which has been added to your home screen to connect.
If not connected or getting errors please try our Trouble Shooter.
-
Please select from the options below:
Computers or Servers
Cloud Providers
Unsure which version of FileBrowser is for you? Check out our comparison page.