How to enable File Sharing on macOS Tahoe
How to share a folder
Follow this easy step by step guide on how to share a folder on your mac:
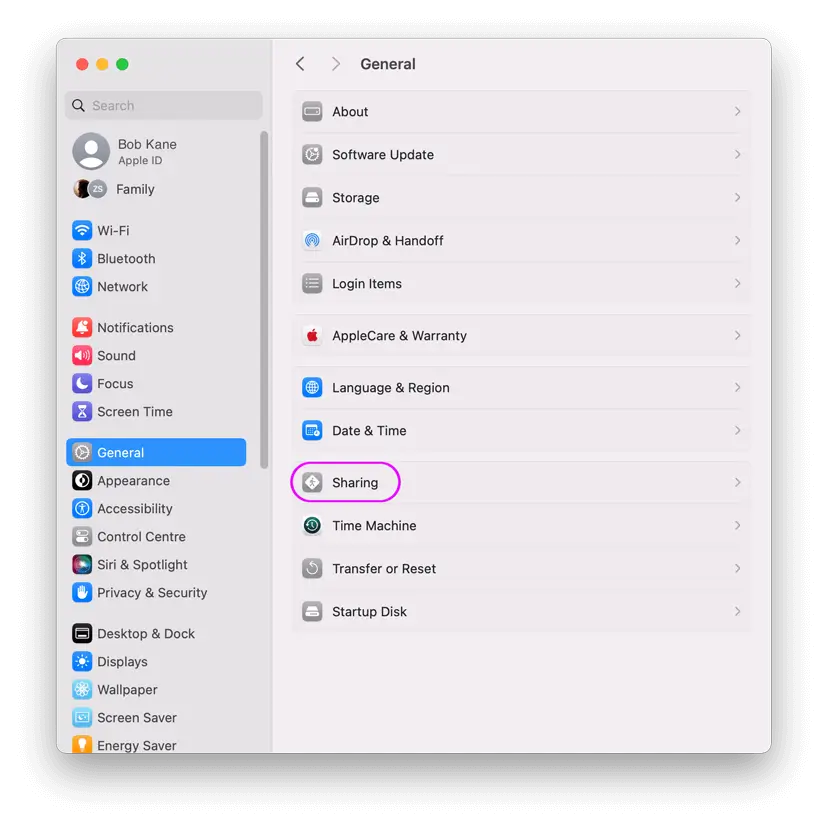
- Start the "System Settings".
- Select "General" in the left hand pane.
- Select 'Sharing'.
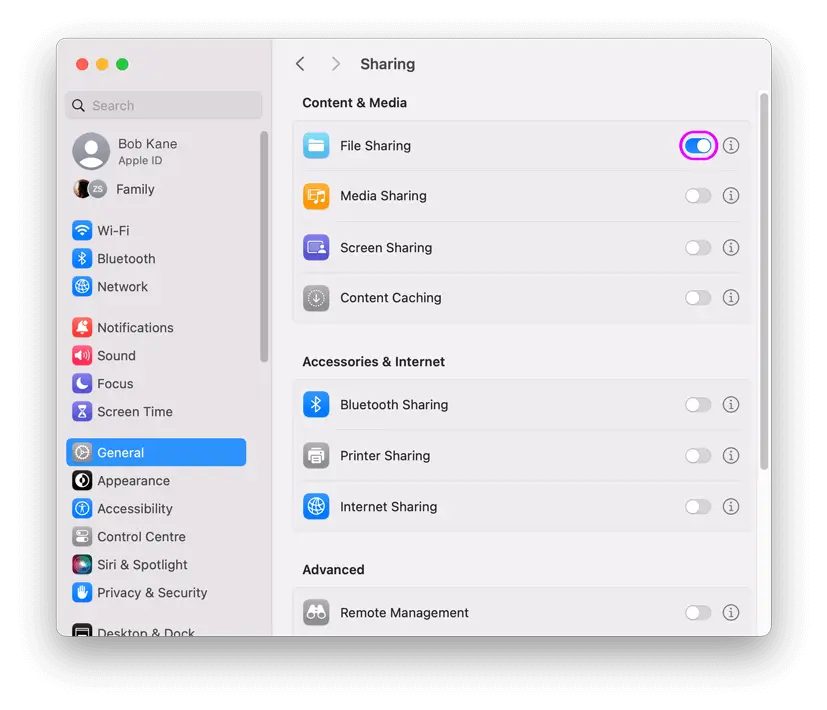
Switch on "File Sharing", and then click on the "i" to the right of the "File Sharing" switch.
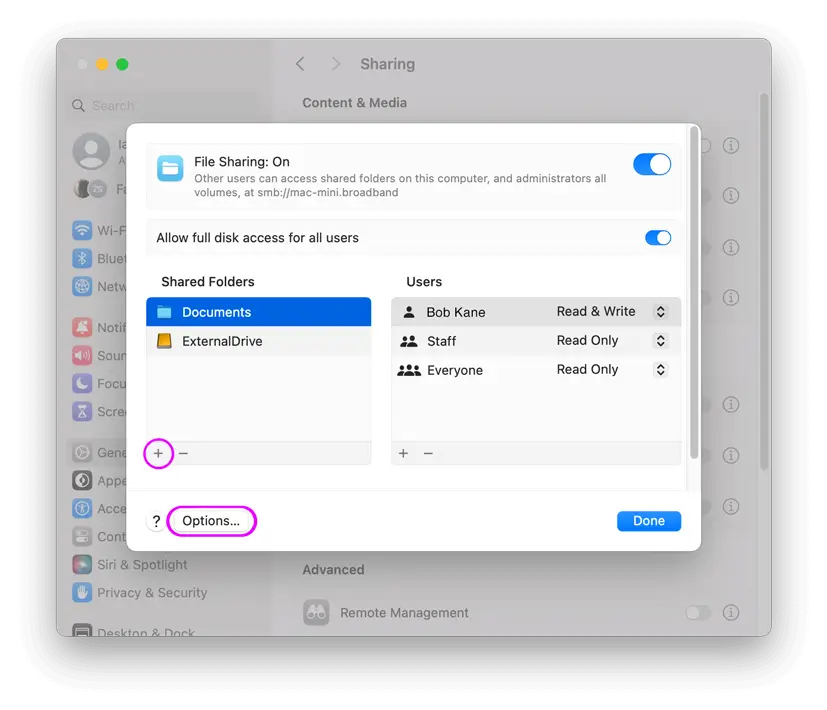
If the folder you want to share isn't listed under the 'Shared Folders' use the following steps:
Click on the “Options…” button.
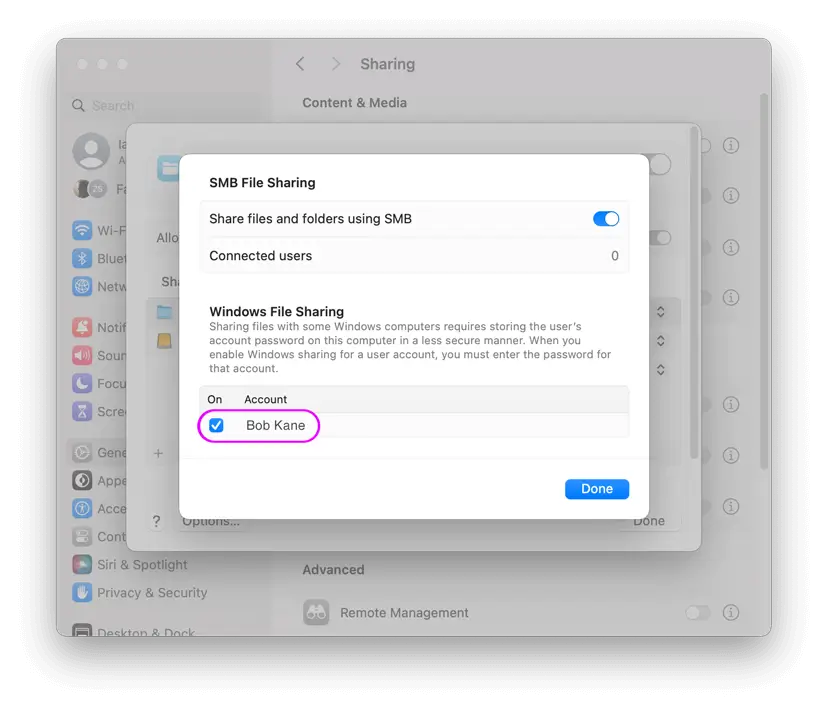
Ensure that your user is ticked.
Ensure that 'Share files and folders using SMB' is switched on.
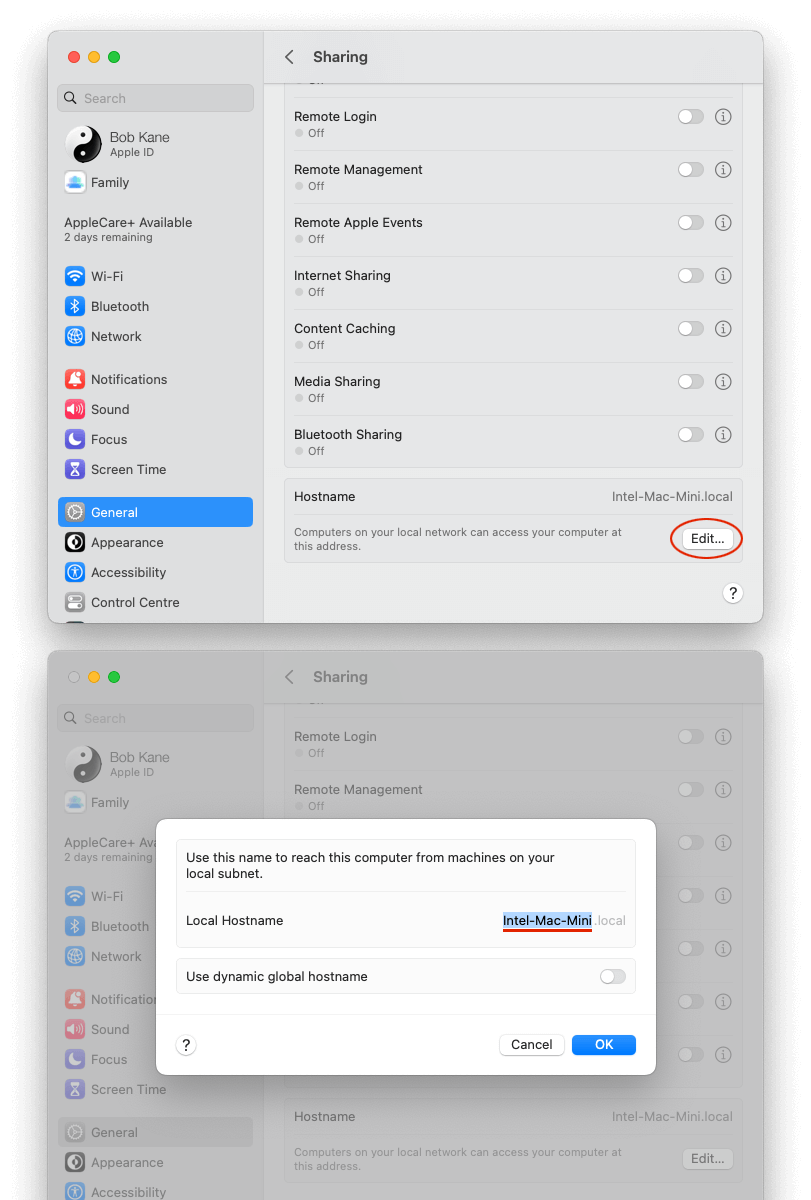
Find your Computer Name
- Open the System Settings app.
- Click "General" in the left hand pane, then select "Sharing".
- Scroll to the button in the "Local hostname" section tap "Edit".
- This is the Network Name of this computer. This should go into FileBrowser's "Name or URL" setting.
- Click Cancel to close the window.
Find Username
- Open the System Settings app.
- Click "General" in the left hand pane, then select "Sharing".
- Click the "i" to the right of the "File Sharing" Switch.
- Then click the "Options" button.
- Your username will be in this list.
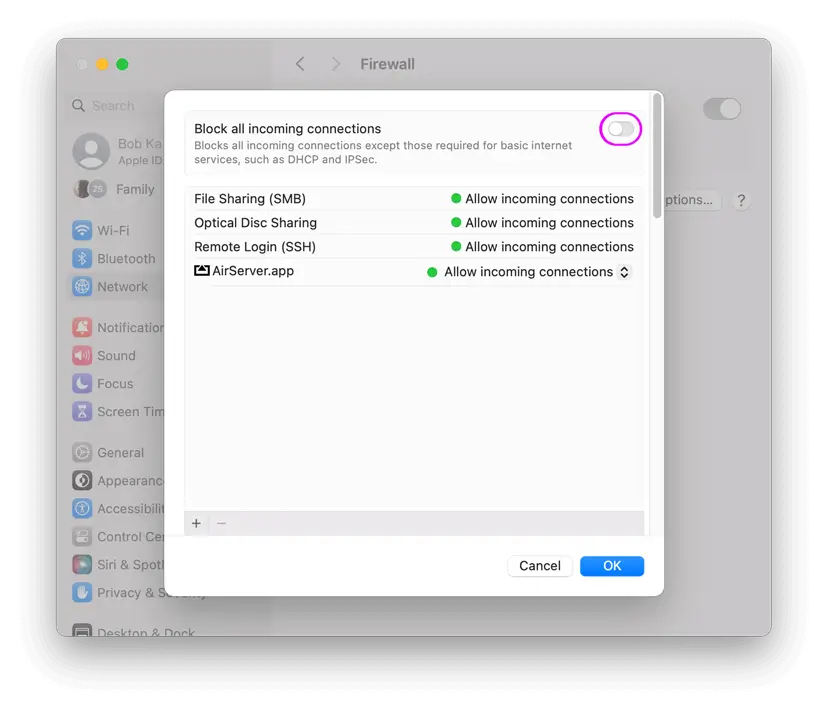
How to configure macOS Tahoe Firewall
- Open the System Settings app.
- Click "Network" in the left hand pane.
- Click "Firewall".
- Then click the "Options" button.
- Ensure that "Block all incoming connections" is switched off.
If your screens do not look like this, your version of macOS might be older try this page.
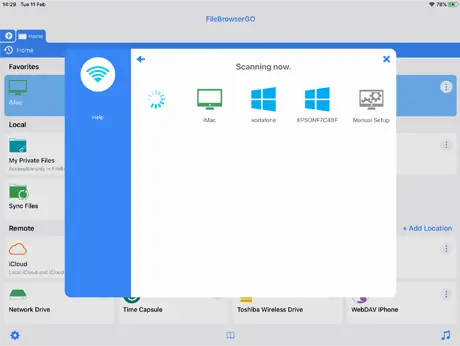
Scan your Network
In FileBrowser follow these steps:
- From the home screen.
- Tap "Add Location" to the right of the "Remote" Section.
- Tap "Computer / Network Drive" this will start a scan of your local network.
- Select your computer from the list.
- Enter your credentials and tap 'Save'.
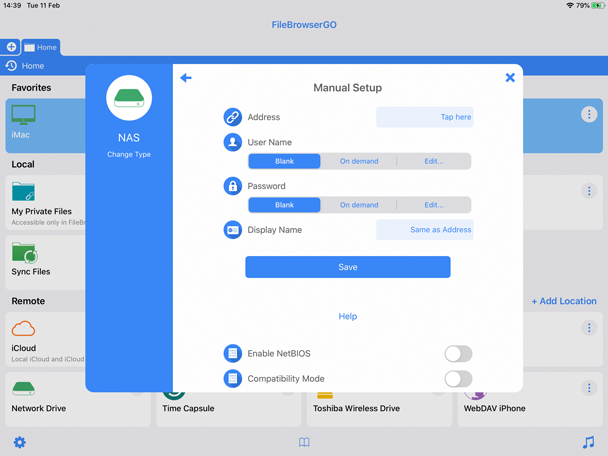
If the scan hasn't worked try adding it manually
In FileBrowser follow these steps:
- From the home screen.
- Tap "Add Location" to the right of the "Remote" Section.
- Tap "Computer / Network Drive" this will start a scan of your local network.
- Tap the 'Manual Setup' icon.
- Take the machine name labelled above with an 'A' and enter it into the 'Name or URL' field.
- Take the username labelled 'B' above and enter it into the 'Username' field.
- Enter the password for your user account into the 'Password' field. If your account doesn't have a password, tap the 'Blank' button.
- Tap the Save button.
- Tap your new location which has been added to your home screen to connect.
If not connected or getting errors please try our Trouble Shooter.
-
Please select from the options below:
Computers or Servers
Cloud Providers
Unsure which version of FileBrowser is for you? Check out our comparison page.