Connect to your Synology NAS using a VPN with your iPad or iPhone
Synology Connection Guide for iOS
Easily access documents and files on your Synology NAS from your iPad or iPhone using FileBrowser Professional or FileBrowserGO when away from home. Organise your files and folders in a professional file management app. Follow our Synology NAS connection guide below.
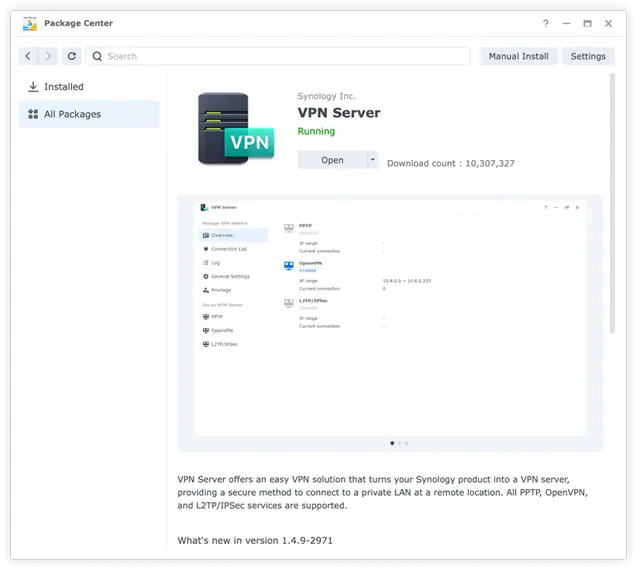
Install OpenVPN via Package Center
For external connection to NAS drives over the Internet, we recommend the use of a Virtual Private Network to ensure data security. Luckily the Synology NAS has all the required features to support this.
Open the Synology Package Center and install the VPN Server package.
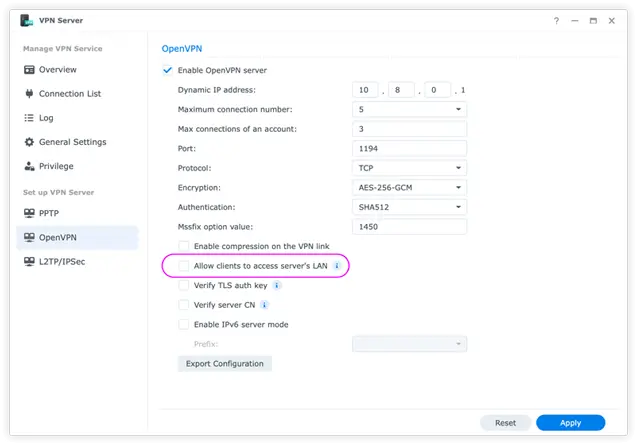
Configure OpenVPN Server
Launch VPN Server and select "OpenVPN" on the left hand side, as shown. Tick "Allow clients to access server’s LAN" to allow access to other network devices or leave unticked to have only the Synology NAS accessible.
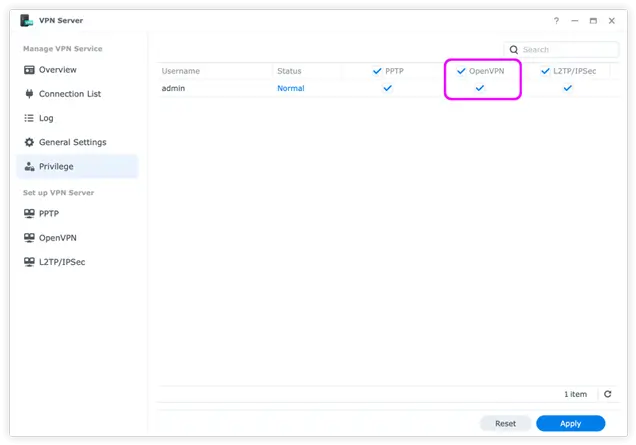
Enable OpenVPN Privileges
Click on "Privilege" in the left hand menu and grant one of your Synology users access to OpenVPN. The Username and Password for one of these will be needed later in the VPN client app.
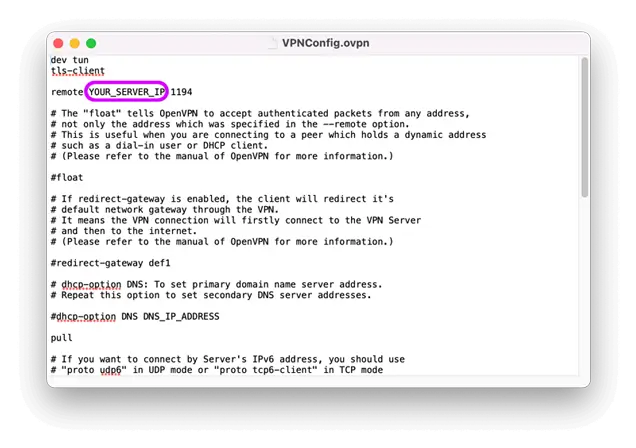
Export VPN Server Config File
The server config is needed to configure the VPN client. Click the "OpenVPN" section on the left, click the "Export Configuration" button, which will download a zip file containing config files that will help configure the iOS OpenVPN app. Unzip the download (which can happen automatically on a Mac), and browse into the folder.
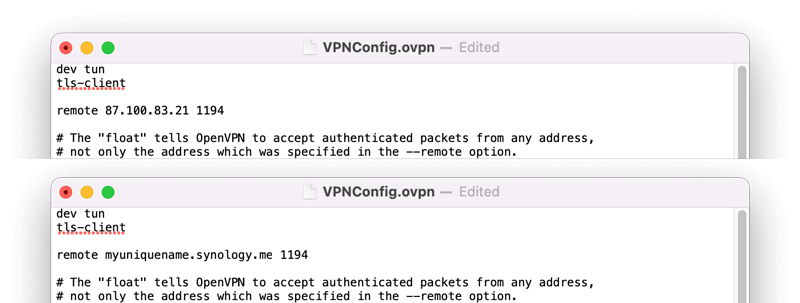
Find the VPNConfig.ovpn file and open it in a text editor. There is only 1 thing in the config file that you need to modify, and that’s the public IP address of your router.
Before we do that lets configure your router to forward VPN connections to your Synology NAS.
Add Port Forwarding Rule
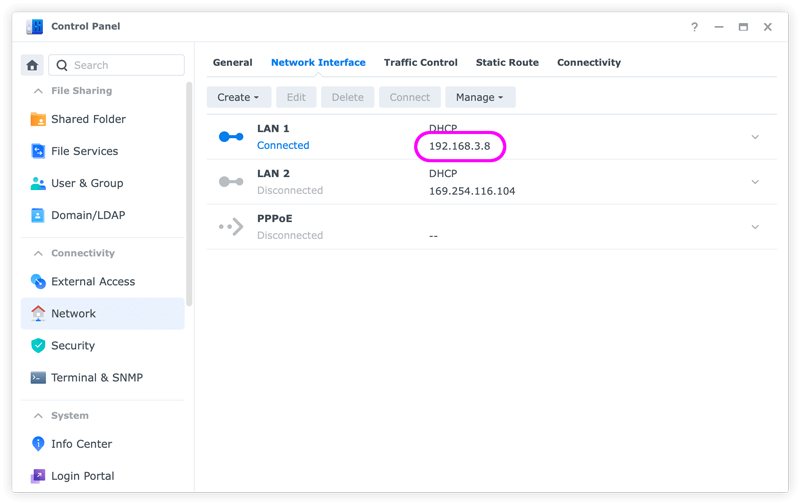
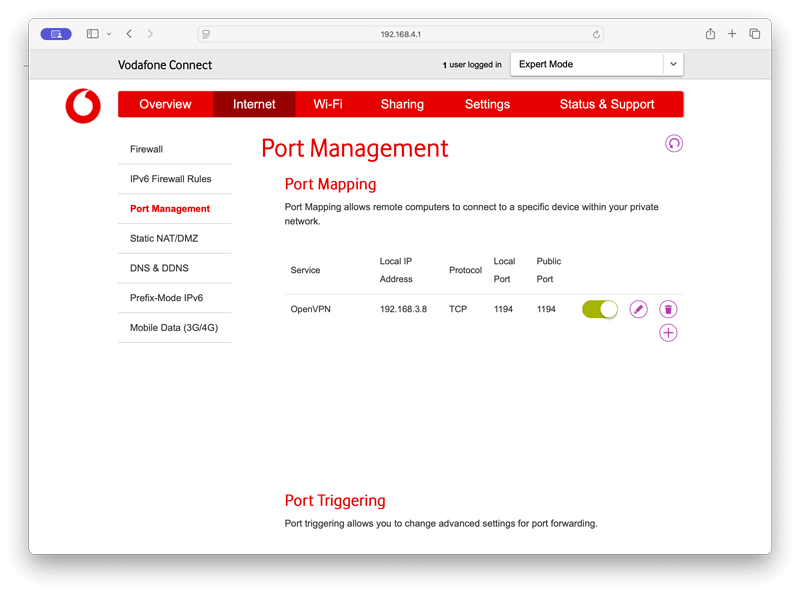
A Port Forwarding rule will need to be added to your Internet Router to forward TCP Port 1194 to the LAN IP address of your Synology. To find this LAN IP address open the Synology Control Panel, select "Network", and the "Network Interface" tab. LAN 1 is the IP Address you will need.
The steps for configuring internet routers vary from one router to another, but the setting is typically called "Port Forwarding" and both the External Port and Internal Port need to be set to 1194. This redirects the incoming connections from the OpenVPN client app to the Synology.
Screenshot of a router showing its port forwarding setup. Please note other routers will appear different.
Find your Router's Public IP Address
The VPN client on your phone will need to connect to your router via the internet. This can be done via a fixed IP address if your router has one or a Dynamic DNS (DDNS) name. Fortunately the Synology also has a solution for this. Please see our DDNS section below.
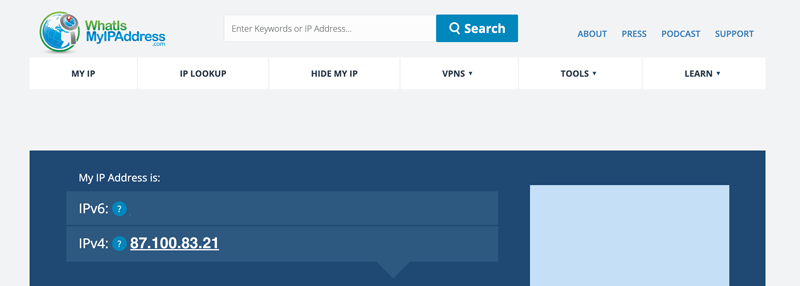
If you are not using DDNS, find your Router's Public IP Address by browsing to Whatismyipaddress.com. The "IPv4" address near the top of the page is the value you need, “87.100.83.21” for example.
Edit the VPNConfig.ovpn file and replace YOUR_SERVER_IP with either the public IP address of your router or its DDNS name, and save the file. We will use this file to configure the VPN client.
Setup OpenVPN Client on iOS
Download the "OpenVPN" client on your iPhone/iPad from the App Store here.
Send the VPNConfig.ovpn file to the OpenVPN app on your phone. To do this use FileBrowser on your iPhone to browse to the folder on your computer containing the VPNConfig.ovpn file, tap the 3-dots icon to the right of the filename and choose "Share". In the iOS Share popup, choose the OpenVPN app (you may need to tap the "More…" icon to see the full list of apps). This should launch the OpenVPN app with this config file.
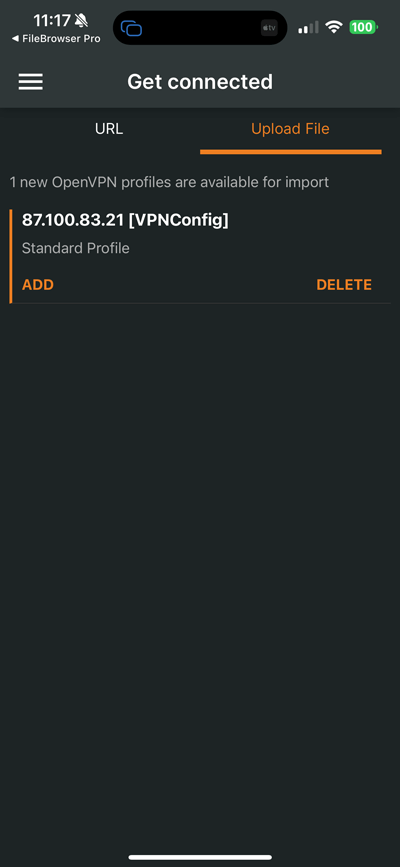
The OpenVPN app should now be showing its Get connected page. Tap on the "ADD" button to import it.
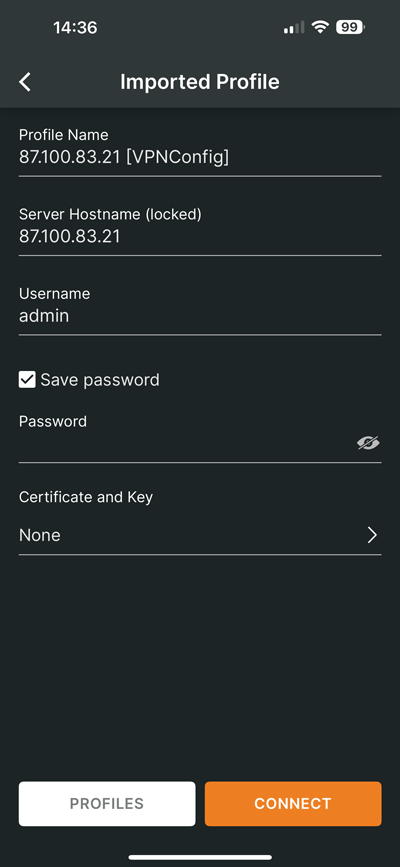
Enter Username and Password
The OpenVPN app then changes to a screen where you need to enter the username and password of the Synology account that you enabled earlier.
Enter the Username and then tap "Save Password" to allow you to enter your password.
Tap the "Connect" button. An iOS pop should appear saying "OpenVPN Would like to Add VPN Configurations". Tap "Allow" and then authenticate to your iPhone/iPad using TouchID/FaceID or your passcode. The VPN config should now be complete.
To test the connection you may need to switch off WiFi on your iPhone/iPad and connect using the cellular network (as if you were away from home).
Configure FileBrowser to Connect
For FileBrowser to connect, the OpenVPN app must first be connected.
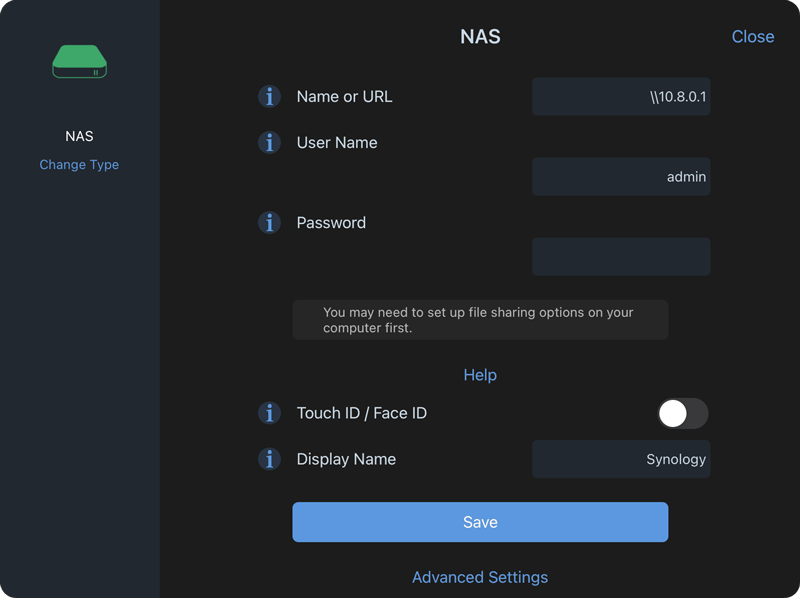
In FileBrowser tap "Add Location" or the "+" icon in the bottom right bar then select "Computer/Network Drive" from the list of connections. Then select "Manual Setup", then "NAS".

Enter your Details
FileBrowser's connection settings for the Synology NAS should use the OpenVPN IP address of your Synology. To find this open the VPN Server package on your Synology, and select "OpenVPN" on the left hand side. The "Dynamic IP Address" (10.8.0.1) is the IP address to enter into FileBrowser.
Enter your details into the setup wizard to continue:
- Name or URL - 10.8.0.1
- User Name - Enter a Synology account username.
- Password - Enter your password for that account.
- Display Name - Call this something like "Synology".
Once finished tap "Save".
If FileBrowser is unable to connect, check the iOS settings by launching FileBrowser, tap "Config", "Info", and "Check iOS Permissions". Ensure "Mobile Data" is switched on.
You are all set. Just tap the Synology Machine on the homescreen to access all your files. The following section outlines how to use DDNS instead of an IP address for the VPN server.
Configure Dynamic DNS
Dynamic DNS is a scheme that allows you to use a fixed internet addressable name for your router that maps to the router's public IP address. This is useful because the router's public IP address can change from time to time.
On your Synology, open the Control Panel and on the left hand side select "External Access"
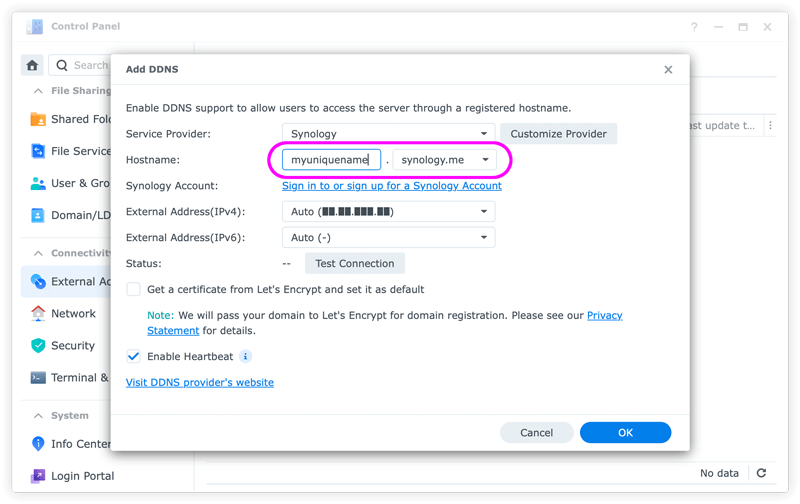
In the DDNS tab, click "Add" and select "Synology" from the dropdown.

Choose a Hostname
Enter a unique hostname, test the connection and tap "OK". The full hostname shown in the popup (e.g. “myuniquename.synology.me”) is the DDNS name to use in the VPNConfig.ovpn file.
Download FileBrowserGO (Free Trial) or FileBrowser Professional to access all your Synology storage from anywhere using your iPad / iPhone.