Step 2: Install ZeroTier on Mac
Installing the macOS client
Step 1 – Download and Install ZeroTier on Your Mac
Download the Mac installer package from the Zerotier Download page here:
Download ZerotierOnce downloaded double-click the package to install it on your Mac.
In Applications, launch the ZeroTier app.
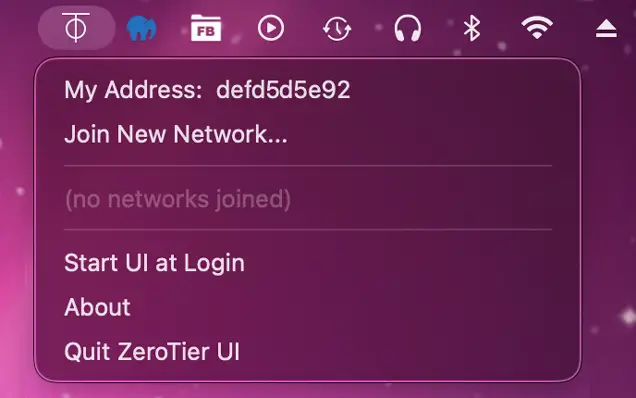
An icon will appear in the top-right toolbar of your desktop ![]() . Left click the icon and select "Join New Network" enter your Network ID into the field and click "Join".
. Left click the icon and select "Join New Network" enter your Network ID into the field and click "Join".
Step 2 – Open ZeroTier and Join Your Network
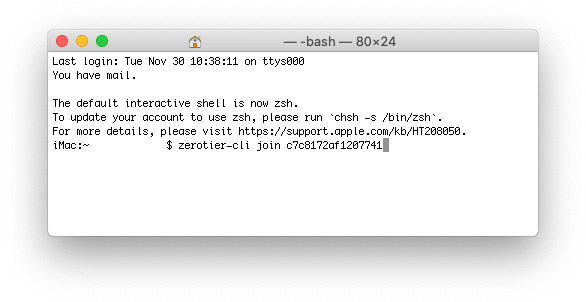
If you don't see the "Join Network" option, then open a Terminal window and type "zerotier-cli join (your Network ID)" then press enter.
Step 3 – Enter Your Network ID and Connect
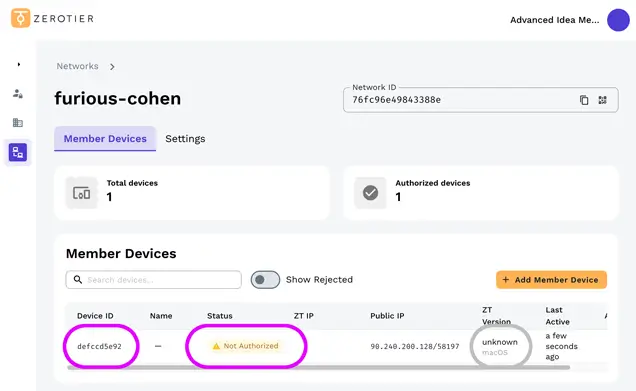
Your Mac needs to be authorised on the zerotier website before you can continue. Click the "Networks" tab on the ZeroTier web page then select your Network from the list. The list shows devices that are either active on the network or are wanting to connect.
Find the macOS device that says "Not Authorized". This should have a "Device ID" that matches your "My Address" number.
Step 4 – Authorise Your Mac in the ZeroTier Dashboard
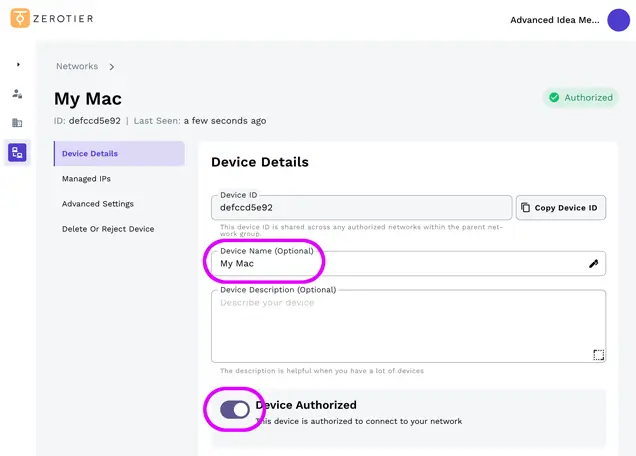
Click the device then:
- Give it a "Device Name" such as "My Mac" this will help you keep track of all your devices.
- Enable the "Device Authorized" switch.
Scroll down to the bottom of "Device Details" and click "Save".
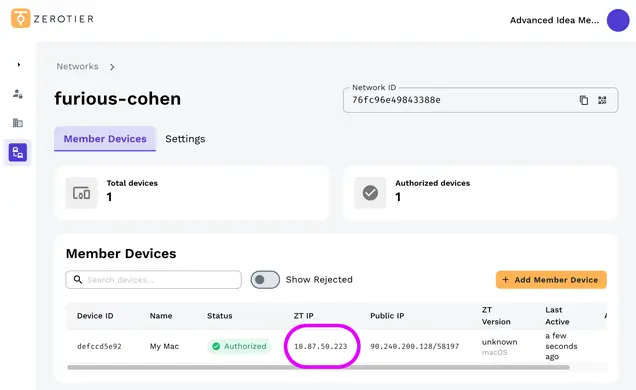
Step 5 – Find Your Mac’s ZeroTier IP Address
Click the Back button to go back to the Member Devices list.
Make a note of the "ZT IP" address. We will use this IPv4 address in FileBrowser later to connect to your Mac.
From the ZeroTier client app "Preferences..." menu item you can enable "Start UI at Login" to save you having to find the app each time you need it.
Yours Mac is now authorized on your Zerotier network. Next connect and authorize your iPad/iPhone devices.
Next StepDo you Have a Synology NAS?
If you want to connect to your Synology device over a VPN, you can use Synology’s built-in OpenVPN Server package. Follow our step-by-step guide here.
FileBrowserGO Limited Free Trial
Try FileBrowserGO with a limited free trial and securely access your files from anywhere on your iPhone or iPad. Connect over a VPN to browse, download, and manage your files just like you would at home.

Unsure which version of FileBrowser is for you? Check out our comparison page.