- Connect to Mac
- Connect to Windows
- Connect to NAS Drives
- Connect to Cloud Storage
- USB Drives
- Map an App folder
- File Selection Mode
- Selecting Images in the Image Viewer
- Copying Files
- Drag and Drop
- AirDrop Files
- Copy Large files with macOS Finder
- Share Files
- Copy to iOS Clipboard
- eMail Files
- Download Files Using URL
- Bulk Rename - Add text to filenames
- Bulk Rename - Add Index or Counter
- Bulk Rename - Find and Replace
- Bulk Rename - Rename with Dates
- Bulk Rename - Rename using EXIF Data
- Rotate Images
- Convert Images
- Create Contact Sheets
- Rate Photos with XMP
- Remove GPS from Photos
- Edit IPTC Properties on Photos
- Slideshows
- - Chromecast Images
- - Airplay Photos
- Supported Music Types
- Play Modes
- Queueing Tracks
- Speed Up/Slow Down Playback
- AirPlay Music
- Chromecast Music
- Cast Music to Alexa Devices
- Recording Audio into FileBrowser
- Create Custom Tasks
- Monitor a Folder for a Keyword and Download Hourly
- Download PDFs from the Last 7 Days
- Trim PDF Pages
- Change IPTC Properties on Images in Bulk
- Rotate Images in Bulk
- Automated Backup of Video Files from a Chosen Folder
- Automate Backup and Deletion of Files Older than a Chosen Date
- Remove GPS from Multiple Photos
- Convert Images in Bulk
- Deleted Files
- Compare Files and Folders
- Siri Reminders
- Siri Voice Shortcuts
- QR and BarCode Support
- Face ID Logins
- Kiosk Mode
- Family Sharing
- FileBrowser for Education Configuration Files
- Transfer FileBrowser for Education Settings

How to Set Up a WebDAV Server on iPhone and iPad
This guide explains how to set up a WebDAV server on your iPhone or iPad using FileBrowser for Education. Once enabled, you can access your files from Mac, Windows, or another mobile device and transfer files securely over your local network.
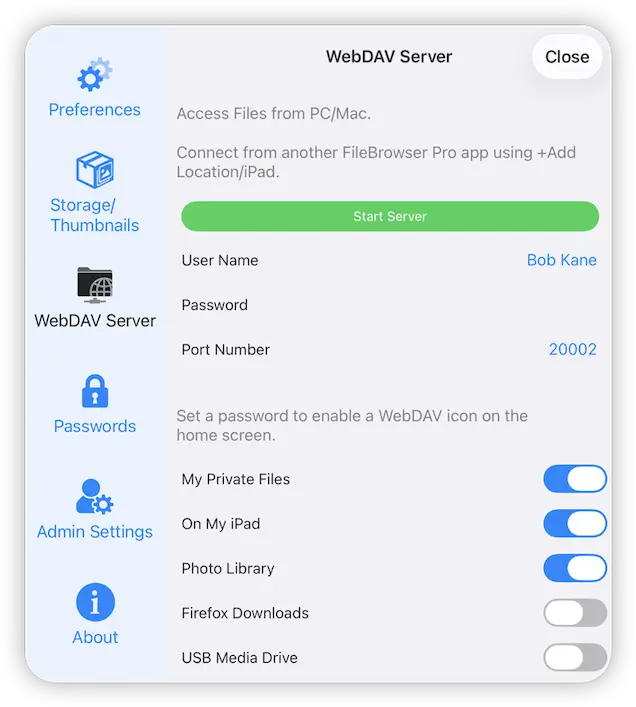
Start the WebDAV Server
To start the WebDAV server on your device:
- From FileBrowser for Education's home screen tap the cog icon
- Select "WebDAV Server"
- Set a user name and password for the server here
- Turn on the FileBrowser for Education locations you want to share via WebDAV using the toggle buttons
- Tap the "Start Server" button.
The WebDAV server is only available in FileBrowserGO and FileBrowser Professional.
Connect to your WebDAV Server
Connect to your WebDAV server from another device. The formats you have to enter these vary from device to device. Select what you are connecting from below to see the steps:
- Mac (macOS)
- Windows PC
- Other iOS Device using FileBrowser for Education's WebDAV client.
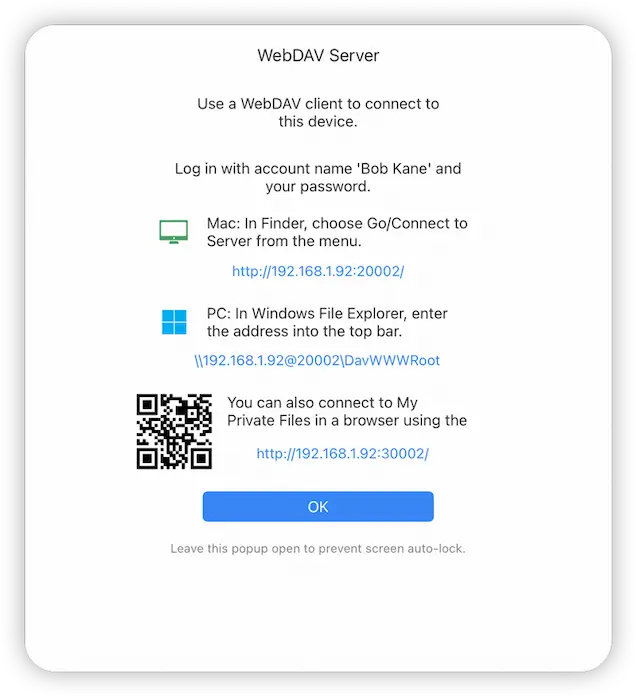
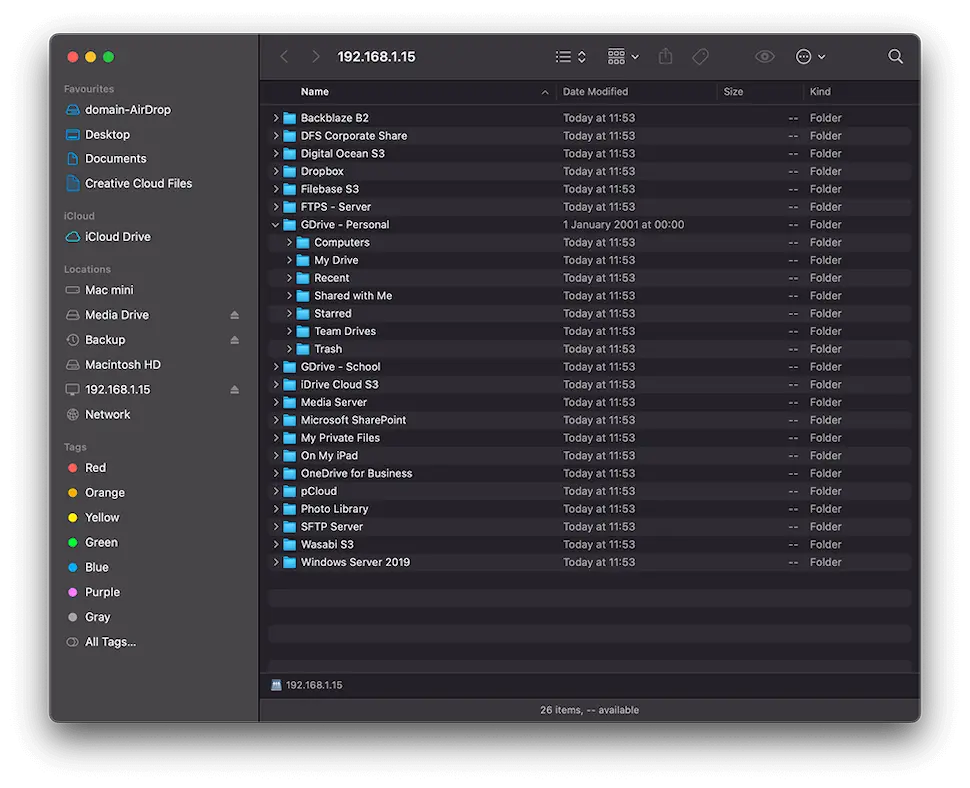
Connect to FileBrowser for Education WebDAV Server From macOS
- Switch to finder and tap "Go" in the top toolbar
- Select "Connect to Server"
- Enter the Mac url that was displayed in FileBrowser for Education here. It will be something like "http://192.168.1.12:20002/" and tap "Connect"
- Enter the username and password you set on your device earlier and tap "Connect"
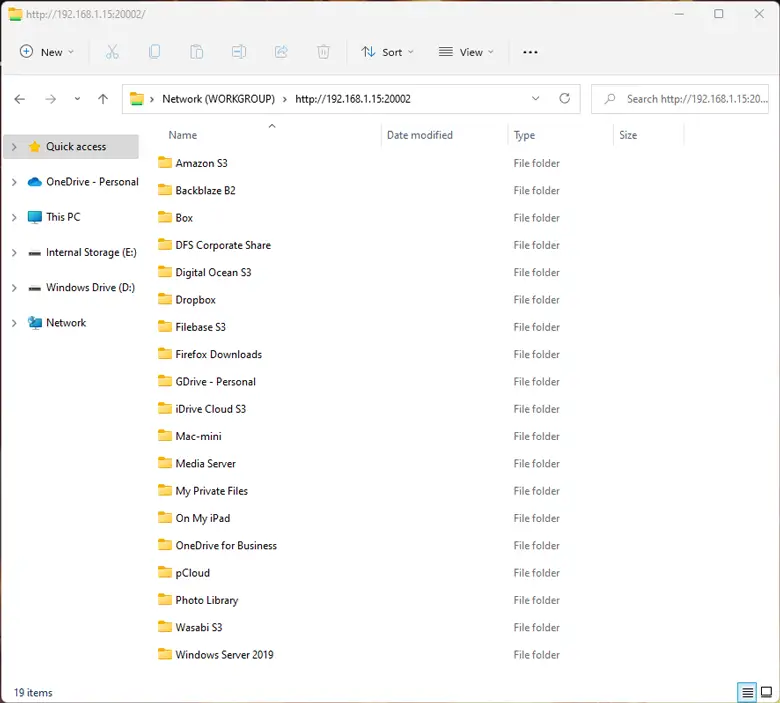
Connect to FileBrowser for Education WebDAV Server From Windows
- Open Windows File Explorer
- Enter the url that was displayed in FileBrowser for Education into the top bar. It will be something like "\\192.168.1.12@20002\DavWWWRoot".
- Enter your username and password you set on your device earlier and tap "Connect"

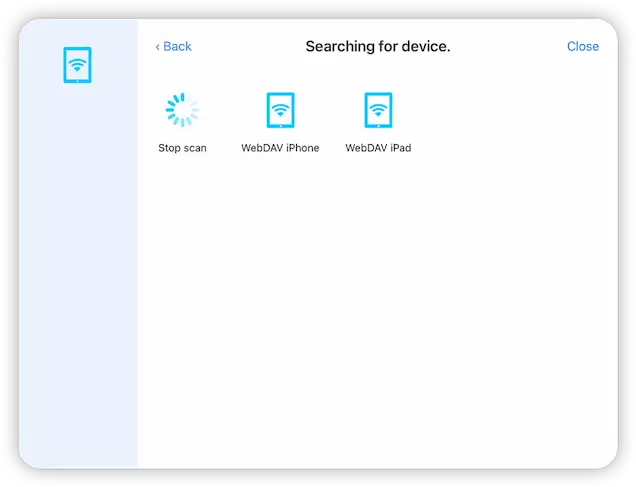
Connect to FileBrowser for Education WebDAV Server From Another iPad/iPhone
- Open FileBrowser for Education and tap "Add Location"
- Select "iPad/iPhone" in the connection wizard, this will open FileBrowser for Education's WebDAV client.
- Tap "Scan Now" and select your device from the list
- Enter the username and password you set earlier and tap "Save"
- This will auto-connect the first time and ask for your password again. Enter it and tap "Connect" and that's it