- File Selection Mode
- Selecting Images in the Image Viewer
- Copying Files
- Drag and Drop
- AirDrop Files
- Share Files
- eMail Files
- Bulk Rename - Add text to filenames
- Bulk Rename - Find and Replace
- Bulk Rename - Add Indexes / Counter
- Bulk Rename - Rename with Dates
- Bulk Rename - Rename using EXIF Data
- Rotate Images
- Convert Images
- Create Contact Sheets
- Rate Photos with XMP
- Remove GPS from Photos
- Edit IPTC Properties on Photos
- Slideshows
- Create Custom Tasks
- Monitor a Folder for a Keyword and Download Hourly
- Download PDFs from the Last 7 Days
- Trim PDF Pages
- Change IPTC Properties on Images in Bulk
- Rotate Images in Bulk
- Automated Backup of Video Files from a Chosen Folder
- Automate Backup and Deletion of Files Older than a Chosen Date
- Remove GPS from Multiple Photos
- Convert Images in Bulk

Managing Cloud Storage in FileBrowser Pro for Mac
This guide explains how to connect cloud storage accounts in FileBrowser Pro for Mac, manage multiple cloud services in one place, and copy files between different cloud locations.
Step 1 – Open FileBrowser Pro and Add a New Location
Open the FileBrowser Pro for Mac app.
Click the "+ Add Location" or the "+" button on the home screen to start the setup wizard.
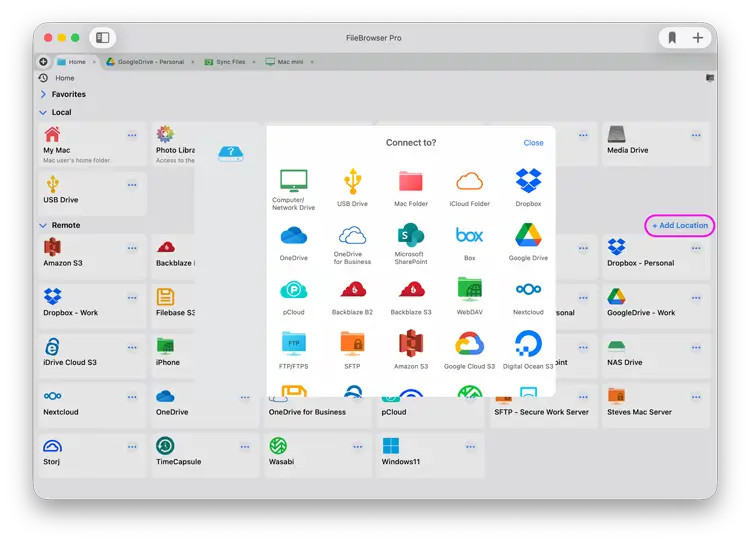
Step 2 – Choose Your Cloud Service and Complete Setup
In the setup wizard select the Cloud Storage you want to to connect to enter your details and click "Save".
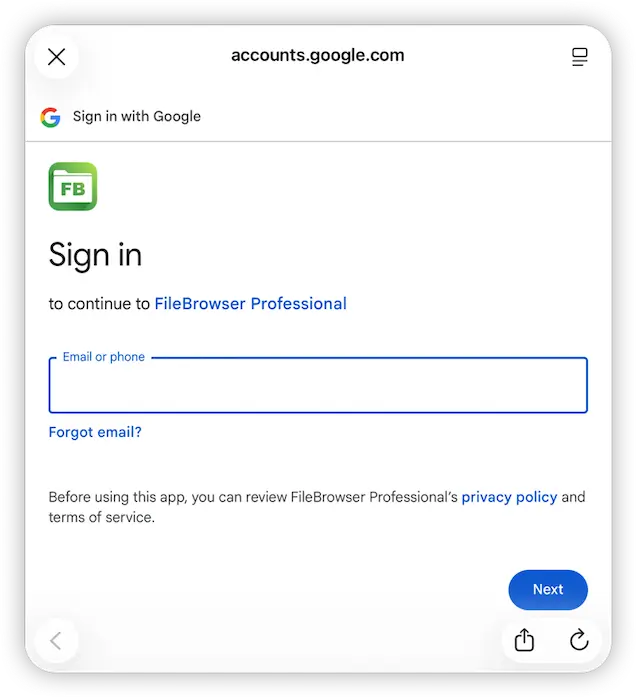
For some connections like GoogleDrive you will then need to open your new location and enter your credentials and will be asked to link your account like this.
For more detailed guides on how to connect to the following cloud providers see links below:
Connection Guides
Use our cloud connection guides to have you setup in minutes.
FAQ
-
How do I manage multiple cloud accounts on macOS?
Yes, most cloud storage apps only allow one signed in account, however FileBrowser Pro for Mac allows you to link and access multiple accounts at once. Allowing you to transfer documents easily between all your accounts.
-
Can I copy files from one cloud to another on macOS?
Yes, this is easy with FileBrowser Pro for Mac simply drag and drop or copy/paste your files between your cloud storage. For example: GoogleDrive to OneDrive.
-
Can I manage multiple cloud storage accounts on macOS?
Yes, link all your cloud accounts including Dropbox, GoogleDrive, OneDrive and Amazon S3 to FileBrowser Pro for Mac manage your folders and copy files freely between your online storage.